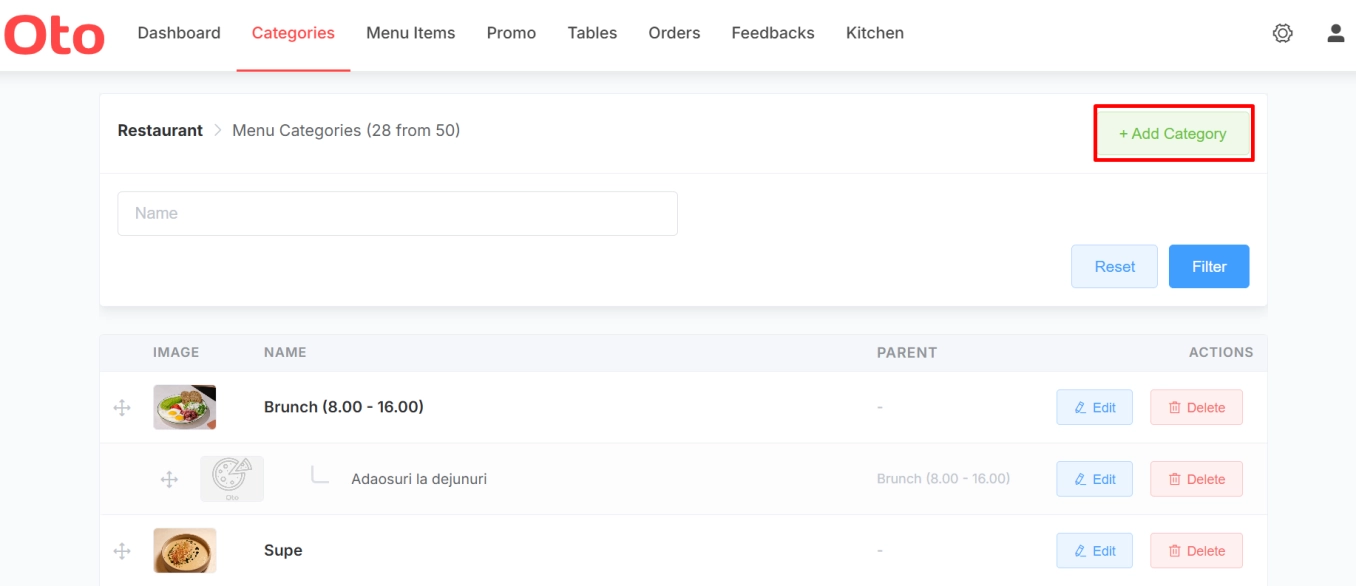
Step 1: Add a New Main Category
To create a major section on your menu (like "Salads" or "Main Courses"):
Go to the Categories tab in your admin dashboard.
Click the + Add Category button in the top right corner.
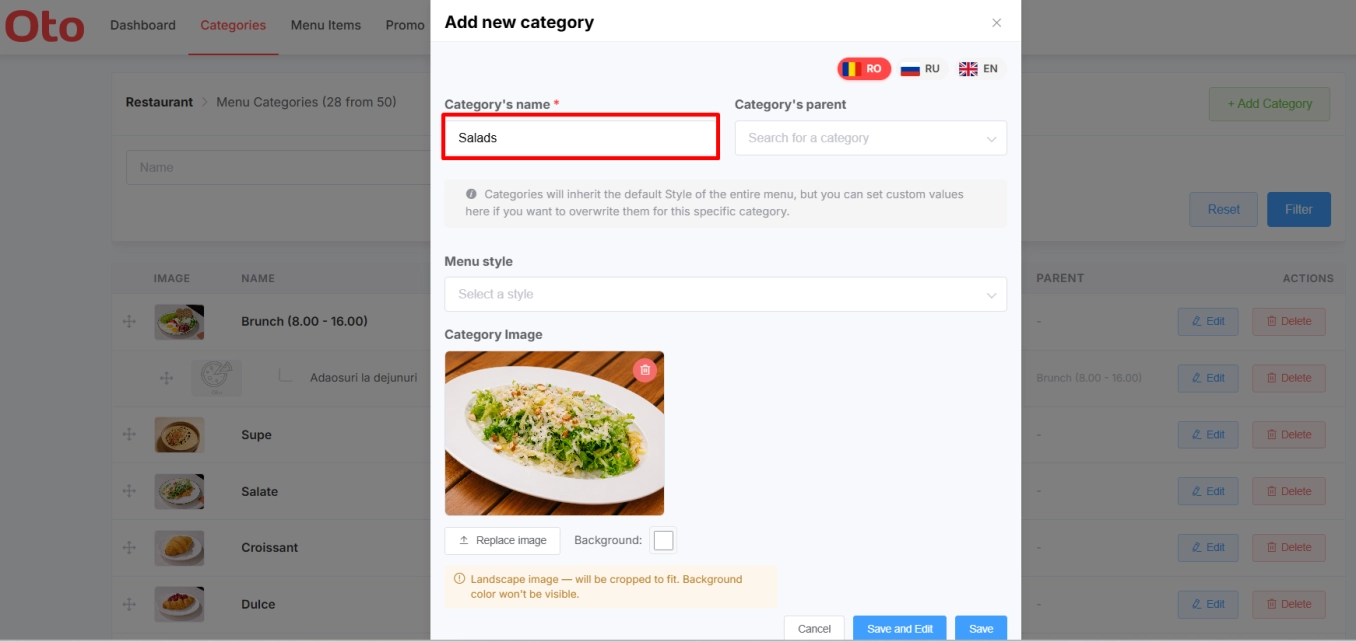
Step 2: Fill in the Category Details
Once the modal pops up, configure your settings:
Category Name: Enter a clear name. Keep category titles short and concise so guests can scan them easily on mobile screens.
Languages: Oto will automatically translate this name into all the active languages you have configured for your store.
Category Image: Click Choose Image to upload a visual thumbnail. Choose close-up, high-quality photos of your dishes to give guests a clear expectation right away.
Click Save to add it to your list.
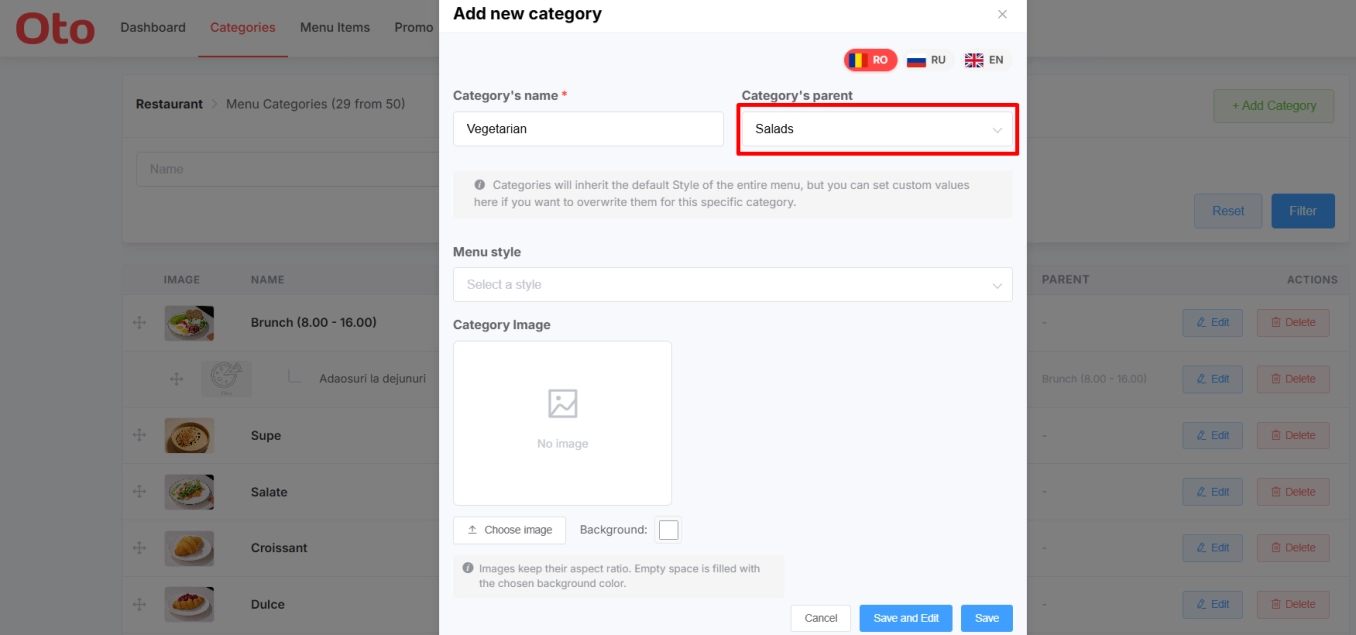
Step 3: Create a Nested Subcategory
If you want to break a major category down further (e.g., adding "Mediterranean Salads" inside your main "Salads" section):
Click + Add Category again.
Type in the subcategory name.
In the Category's parent dropdown menu, select the main category this belongs to (e.g., select "Salads").
Click Save.
Note: You do not need to upload an image for subcategories, as they inherit the visual nesting structure on the digital menu layout.
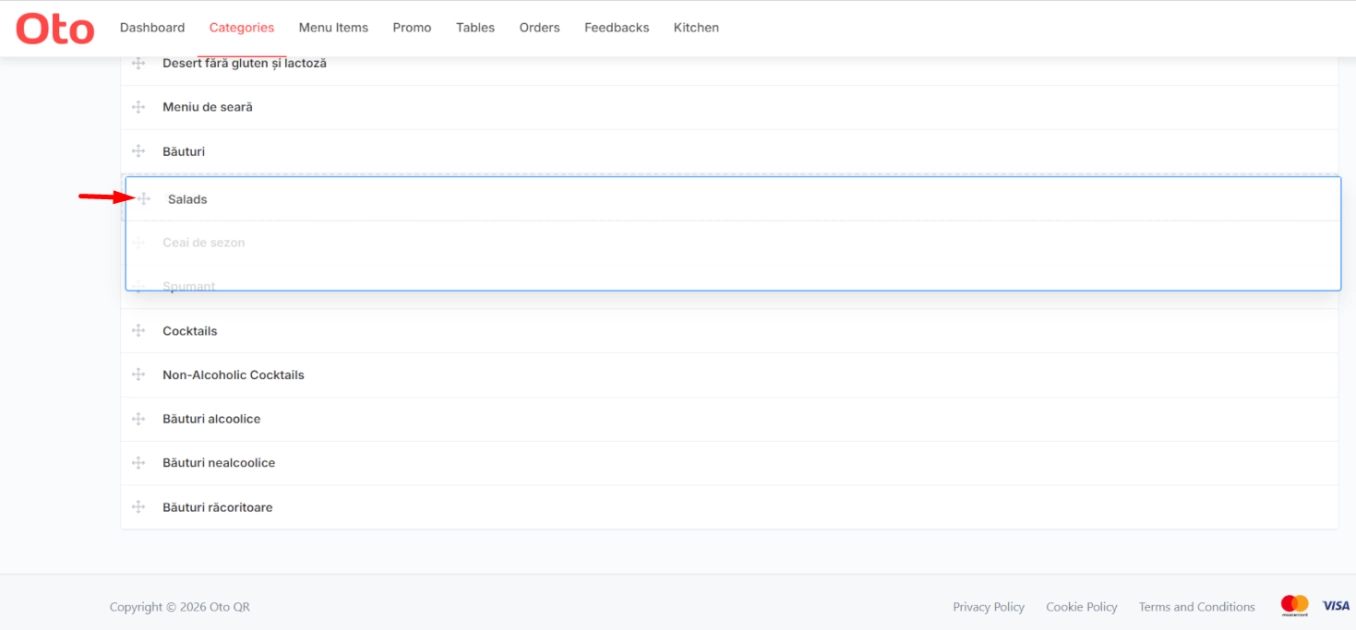
Step 4: Reorder Your Menu Layout
By default, any newly created category or subcategory will appear at the very bottom of your dashboard list. To change their priority:
Locate the cross/arrow icon on the left side of the category row you want to move.
Click and hold the icon, then drag and drop the item up or down to its new position.
A green success message will confirm that your category order has been successfully synchronized across the system.