



Part 1: Creating a New Menu Item
Adding items to your menu is a very simple task in our platform. All you need to do is click on + Menu Item from the list of all menu items.
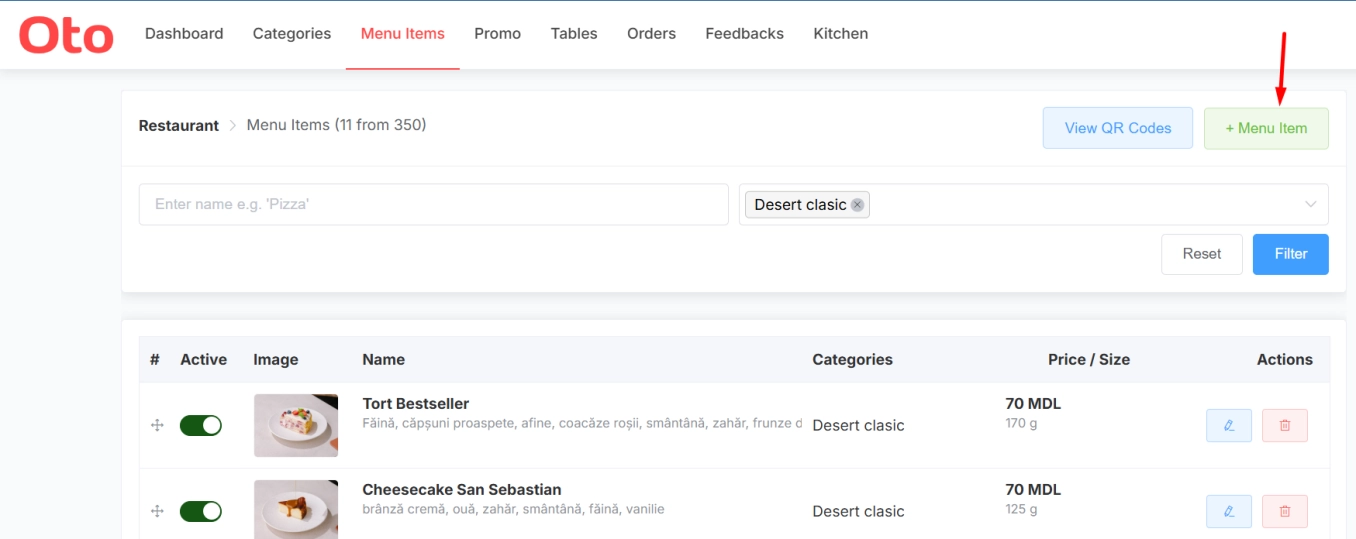
We can then take a look at the form that pops up, and work our way through it.
Step 1: Input the Basic Product Details
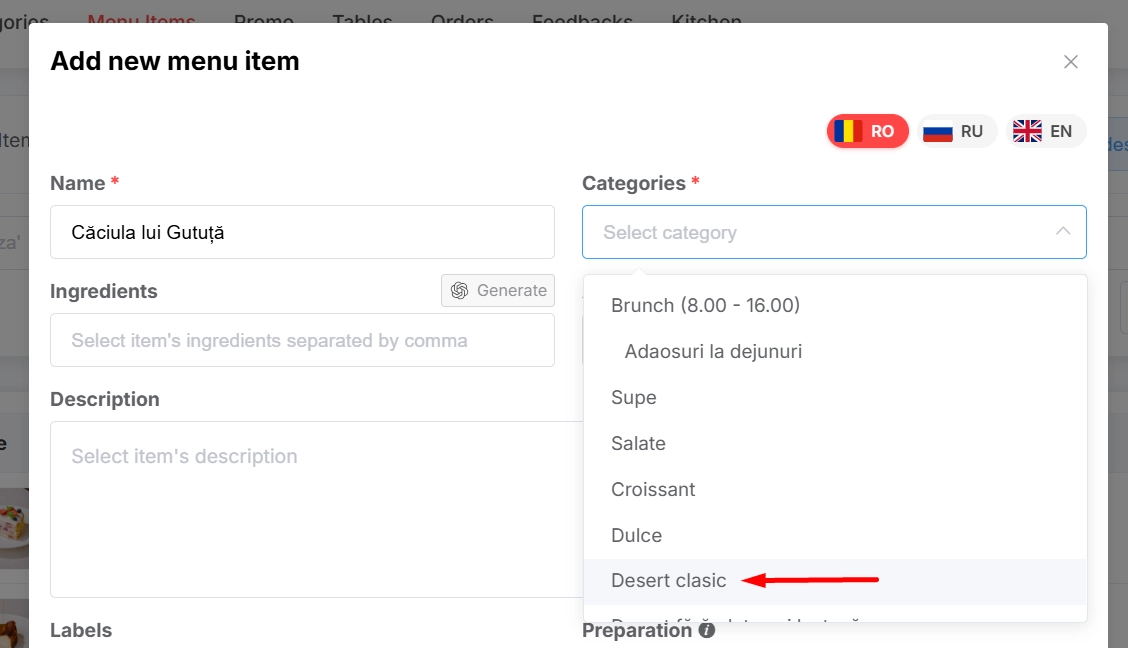
Start with the product name and its category:
1. Name: Enter your product's name.
2. Categories: Select the category that your new item will be under.
Step 2: Configure Automatic Properties with AI
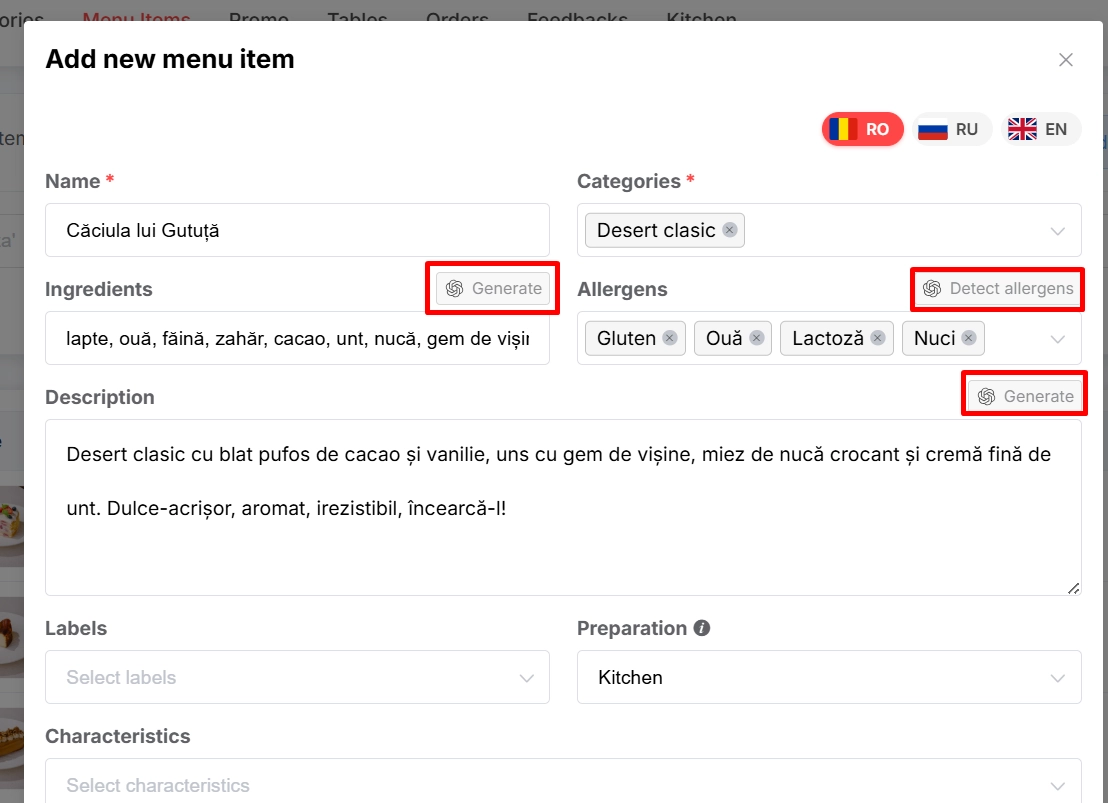
One of the great features of the Menu Item list is that it can identify property fields automatically for you based on the name you input for the item.
To do this, simply input the required fields and then click on Generate:
· Ingredients : Generate ingredients in seconds after inputting the product's name.
· Allergens : Based on the ingredients, the system will detect all the allergens for the item automatically.
· Description : After inputting all the fields, click on generate and get a perfect description for your item.
Step 3: Fill out the Rest of the Mandatory Fields
Next, you will need to fill out some of the specific properties about your item.
1. Labels : Let your users know what type of item it is, from a Bestseller to a Seasonal item.
2. Preparation : Let your staff know where the dish needs to be made.
Step 4: Configure Variants and Nutrition Facts
This next section is all about defining the exact variant of your item, including size, portion and price. To complete this:
1. Add your desired portion Size.
2. Add your product's Price.
Step 5: Configure nutrition facts and add an image
Finally, we are going to complete all the extra data, calculate nutrition facts, and add a striking image for your item:
1. Fill out your item's Nutrition Facts or leave it to the platform.
Tip! Once again, we can let our smart system calculate the nutrition facts for us based on the ingredients list.
2. Lastly, add your high quality Image.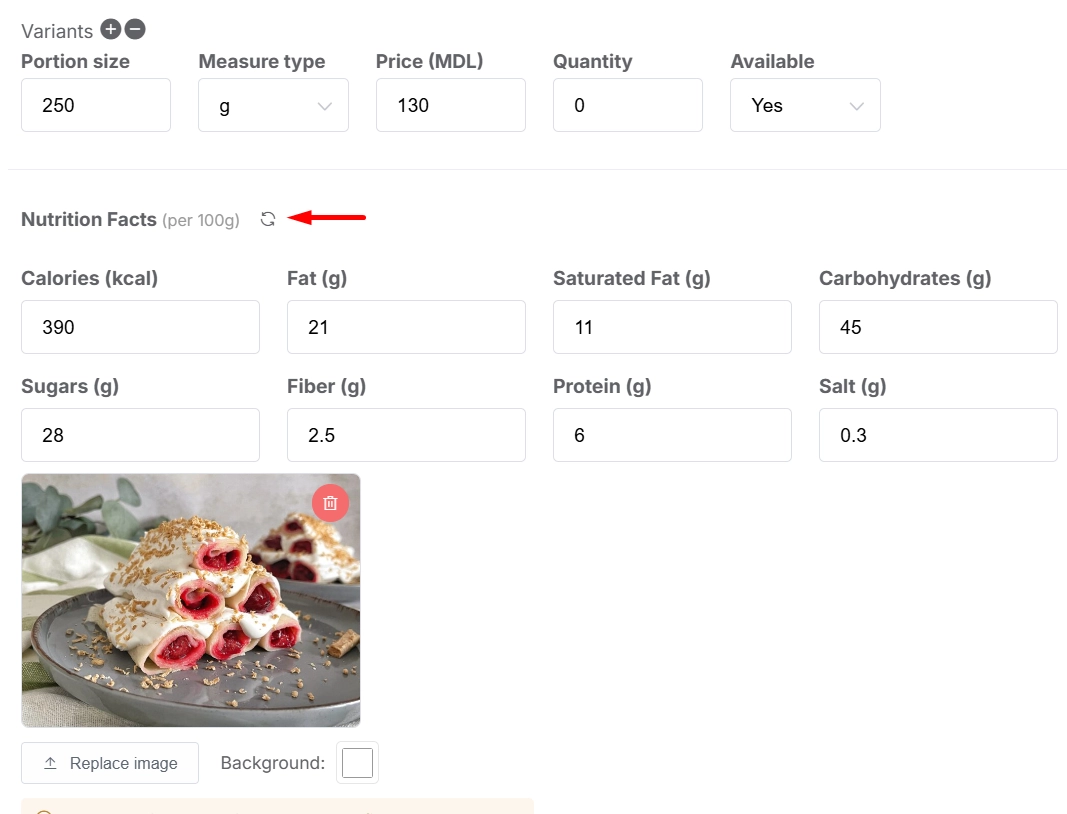
Step 6: Save and Publish
Congratulations, you are now ready to publish your item. All you need to do is click Save.
Note! Once you click Save, the system will auto translate your content into all other languages selected. If you want to see the translation, simply click on the flag of the desired language at the top after you have Saved your menu item.
Part 2: Configuring Stop Lists and the Items' Positions
So far, we have created our new menu item and configured all its properties. Now, let's learn how to find our new item and how to change its positioning.
We will do this using the Filter and Search features. In this case, we have a name for the new product, so we can use that to find it, or even the category that we chose earlier. Let's find our dish by Category.
Once we have filtered for our desired category, let's find the product.
Stop lists: If we need to, we can click on the green toggle for the active product and it will be hidden from our menu. This is a very useful feature to hide items during stop lists, for example.
Positioning: Lastly, we can change our new product's position. Click on the cross to the left of the item and you can drag and drop it into a higher or lower position.
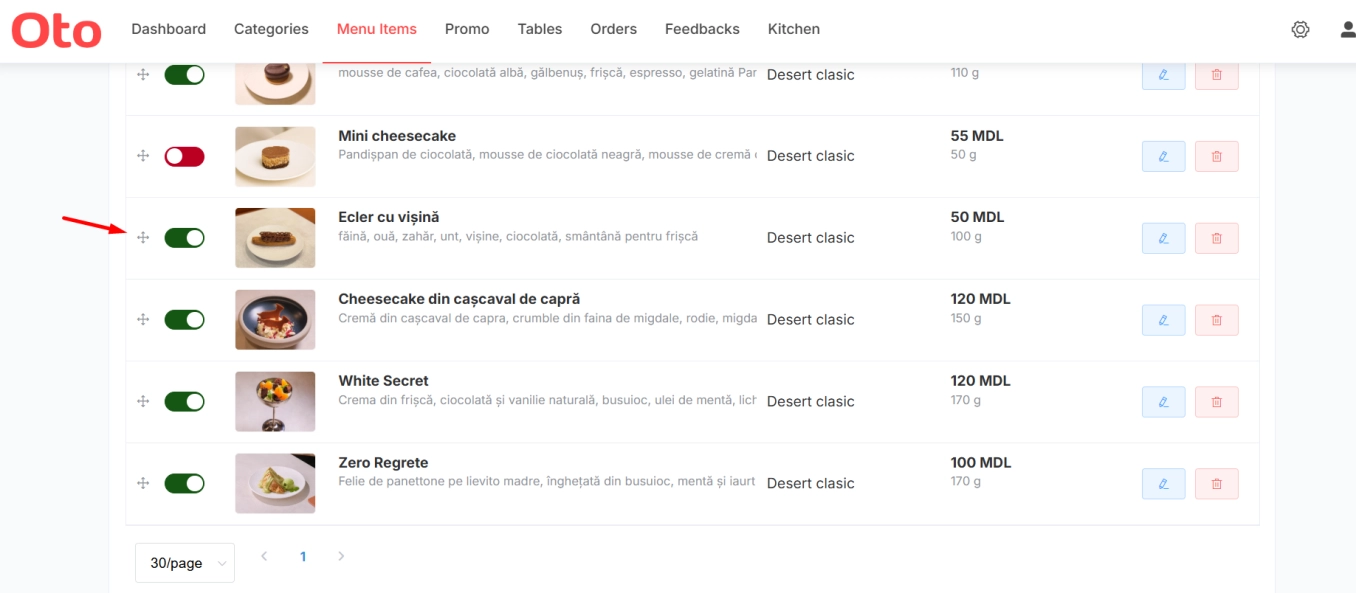
You are now a pro at managing all your dishes and menu items! I hope this article was useful to learn how to add menu items and manage your inventory. If you need any more information, just ask!